Alternate title: How to find legally usable images through Google image search.
In my mind, the process of creating a compelling composite image is as close to painting as a photographer can get: it allows you to create almost purely from imagination, not being constricted by physical locations as with traditional photography.
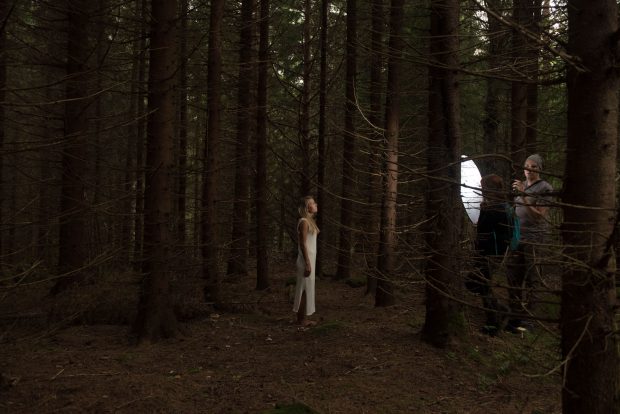
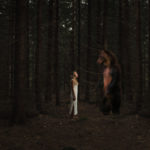
Last summer, I had a shoot with a few friends while we were staying at a cabin over the weekend. This was a low-key, just-for-fun shoot in some creepy woods near the cabin. Here’s another shot from that day, which I uploaded to Instagram:
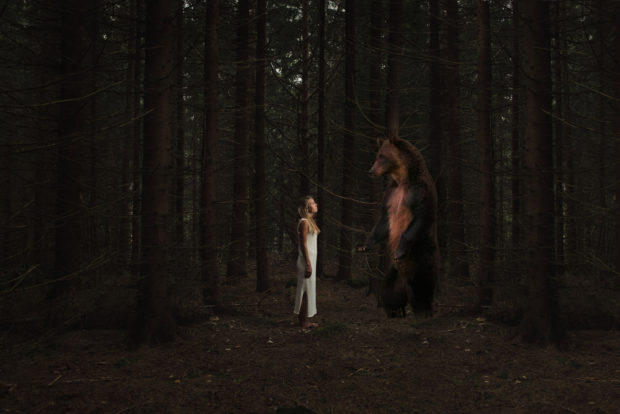
For this shoot, the model was lit with a Nikon SB700 through a semi-transparent reflector on her right (this is a handy trick if you happen to find yourself without a softbox but with an assistant who can hold the flash and reflector). Here’s the image before any compositing:
As you can see, this version looks quite a bit different from the finished composite. While editing photos from a shoot, I have the tendency to ask myself: would this work as a composite? Or, would adding some other elements make this a more interesting picture?
For this picture, the answer was clear (in my mind) right away. I needed a bear.
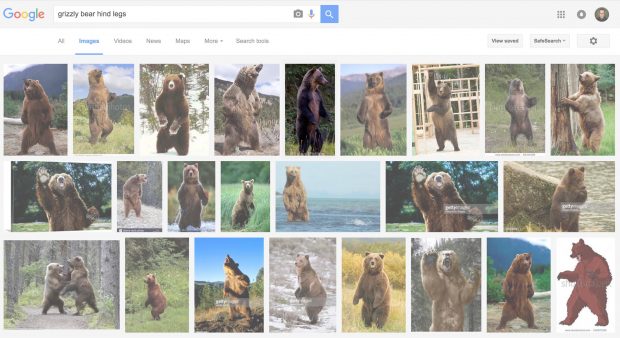
When you have an idea for an image and need a specific picture to make it work, there are several options. If you have a budget, you can search on traditional stock photo sites (such as iStockPhoto or Dreamstime); if not, you can check out some royalty-free options (such as Unsplash or Pexels). Since this was a personal project and my budget was precisely 0€, I skipped the paid options. And since I had a very specific image in mind (a bear standing on its hind legs photographed from the side), I couldn’t find an appropriate image in the limited catalogues of the royalty-free galleries. In this case, I delved into the third choice: Google image search. After a few tries, searching for “grizzly bear hind legs” came up with some promising choices (the highlighted photo was the one chosen).
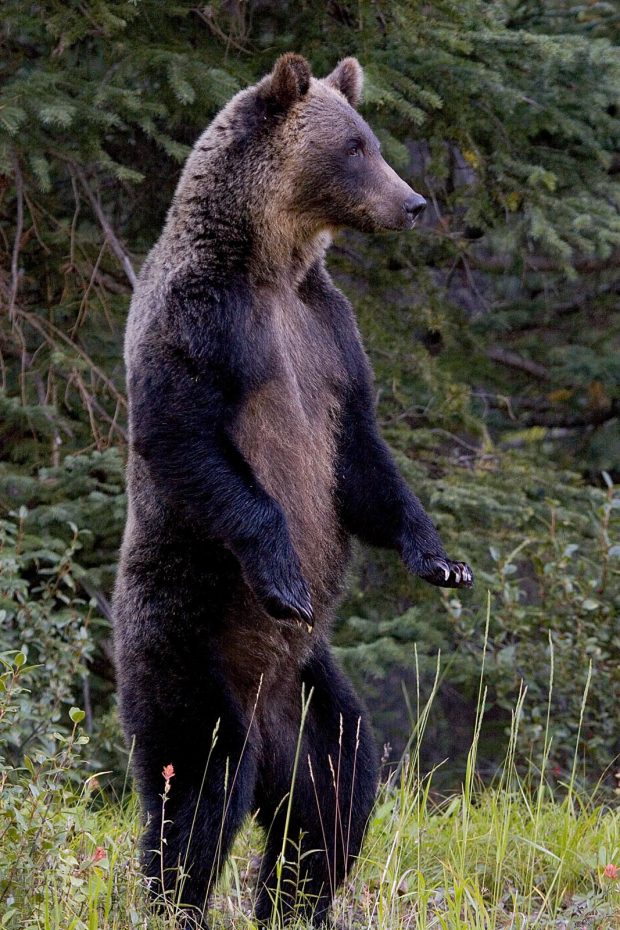
Now, it wouldn’t be good to use a photo found from Google without permission (even if it is for a personal project). Thankfully, the photo I found had a watermark, which I used to track down the photographer, Kirsten Phillips, through a combination of Google and Facebook sleuthing. She responded through a Facebook message and was kind enough to send me the full-resolution file in exchange for giving her credit when the photo was published. Here is the full-resolution photo Kirsten sent me:
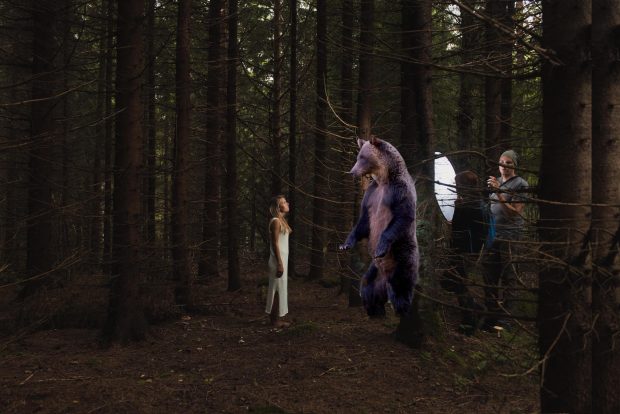
Now, the bear’s posture was perfect for the picture, but the lighting and colors didn’t quite match. Nothing a bit of Photoshop can’t fix. First, I flipped the bear horizontally, then used a layer mask to get rid of the background and cleaned up the grass strands on the bear’s legs. I also changed the angle of the bear’s head so that it would be looking down at a bit more of an angle. Here is the bear added to the original image:
I still had to get rid of my handy assistants and match the bear to the background. Instead of attempting to clone them away, I copied the area to the left of the model, mirrored it, and placed it behind the bear. After a bit of touch up, the image looked like this:
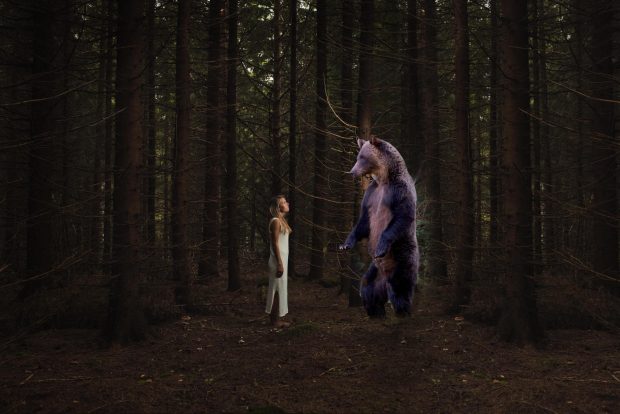
The only thing left was to color- and light-match the bear. After numerous adjustment layers (mainly curves and solid color overlays), I had a finished image:
Overall, the process took several (aka way too many) hours. But I’m happy with how the final, out-of-the-ordinary image turned out. In case you want a bit more of a taste, here is a short time-lapse style video showing all the different layers involved:
Model: Ruut Uusitalo.
You might also like


2 Comments
[…] About the author: Aaro Keipi is a Helsinki-based wedding and portrait photographer who also frequently works out of Washington, DC. You can find more of his work on his website, or by following him on Facebook and Instagram. This article also appeared here. […]
[…] Concerning the creator: Aaro Keipi is a Helsinki-based wedding ceremony and portrait photographer who additionally steadily works out of Washington, DC. You will discover extra of his work on his website, or by following him on Facebook and Instagram. This text additionally appeared here. […]